How to Manage Languages in Joomla
Updated on Mar 13, 2019
This tutorial will provide details on how to install a new language on your Joomla website and how to activate it after that. With the latest Joomla 3.x release, the installation of new languages is the easiest process and it will provide a wide range of different languages.
In this tutorial, you will learn how to:
Install a Language Pack
Log into your website as administrator and navigate to Extensions from the top menu and then Language Manager.
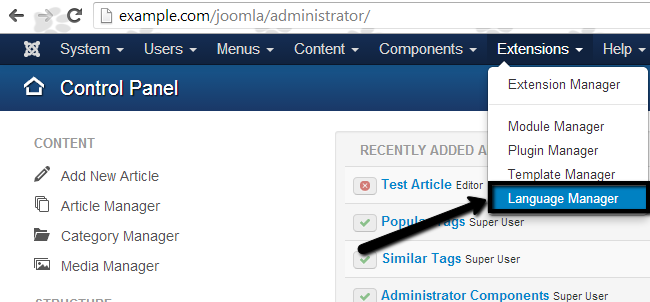
You will be taken to a new page, where you can see the currently installed languages on your Joomla website. Note that the language for the front and the back end of your website is different and should be configured separately. To proceed, click on the Install Language button at the top.

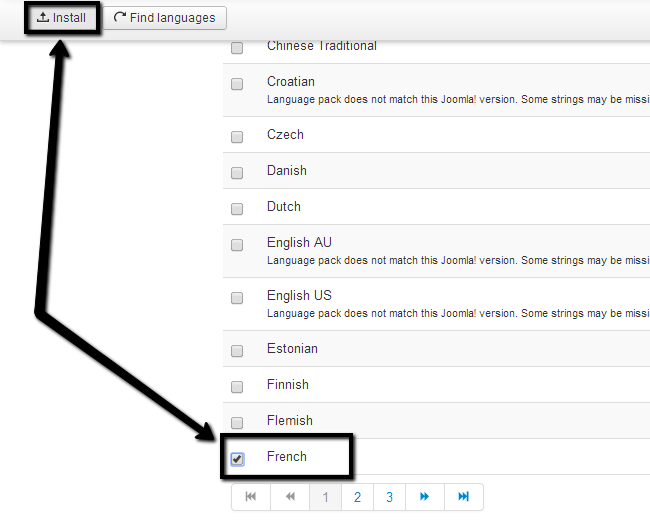
You will see a list of all the language packs and the version of Joomla they have been developed for. Make sure that the version matches your Joomla installation in order to make sure that the translation is proper. For the purpose of this tutorial, we will install the French language pack.
Select the language pack that you wish to install and click on the Install button at the top.
Activate Languages
Log into your website as administrator and navigate to Extensions from the top menu and then Language Manager.
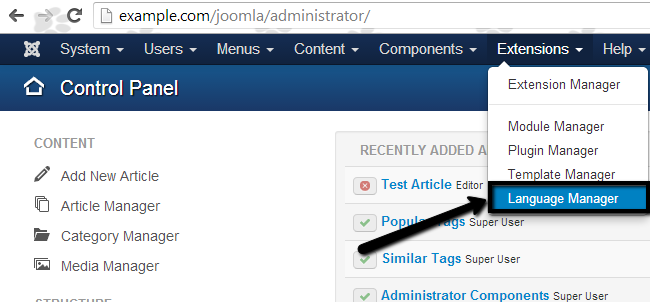
As mentioned in the previous chapter, you will be taken to a screen that will list all of the installed languages on your website. You have the ability to activate a specific language for the front end only, the administrative area only or for both at the same time.
Click on the Installed - Site tab and select the language that you wish to activate and then click on the Default button at the top.
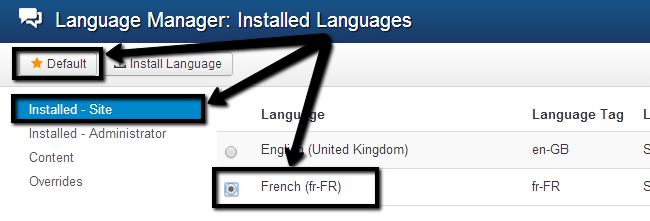
This will activate the French language for the front end of your website. If you would like to activate the language for the administrative area as well, you need to click on the Installed - Administrator tab.
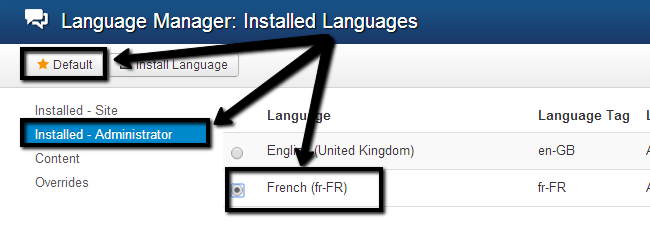
Then select the language that you wish to activate and then click on the Default button at the top.

Joomla Hosting
- Free Installation
- 24/7 Joomla Support
- Hack-free Protection
- Fast SSD Storage
- Free Domain Transfer
- Free Joomla Transfer
- Free Cloudflare CDN