How to Upload and Install a Ghost Theme
Updated on Nov 23, 2022
Ghost's default theme (Casper) is quite elegant and has a lovely design. Some people, however, would prefer a more personalized approach. As a result, the developers have included an option to install other themes created by a third-party vendor, such as ThemeForest, or a completely custom theme created by the user using the guidelines in the official documentation. In any case, installing a theme is a simple task that we will walk you through in this section of our Ghost tutorial.
Getting Started
To begin, you must log into your Ghost Admin Dashboard. Launch your preferred browser and type your domain name followed by "/ghost." For instance: example.com/ghost

- Once logged in, go to Settings:

- Access the Design tab:

How to Upload and Install the Theme
You will be able to modify and add more navigation menus to your blog via the Design page, as well as upload and install a theme.
To upload your theme files:
- Click on Change Theme in the bottom left corner of your screen:

- You can locate the Upload Theme button:

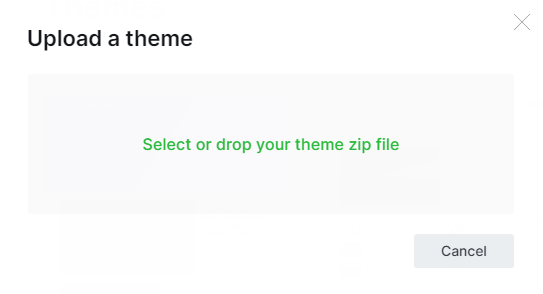
- When you click on it, a popup window will appear, asking you to either drag and drop your theme's archive onto the screen, or click in the middle of the window, which will allow you to select the archive directly from your computer:

- When you select a new theme, a blue progress bar appears to indicate that the theme is being uploaded. When the process is complete, you will see an "Uploaded successfully" message and the option to activate your theme immediately.
- Click the Activate button in the popup window to activate your theme. After that, your new theme will appear at the bottom of the Design page in the Installed Themes section.
- Depending on the state of the theme, you will have a few options - Download or Activate.
You can archive and download the theme to your computer or device by clicking the Download button. If the theme is not currently active, a link to Activate it will appear. By clicking the Activate button, you will make this theme your blog's default.
It's as simple as that! Installing a theme purchased or created through the Ghost publishing platform's dashboard. If you are a FastComet customer and are unsure about installing the theme yourself, please contact our Technical Team through the ticketing system. They are available 24 hours a day, seven days a week, and will gladly help you!

Ghost Hosting
- Free Ghost Installation
- 24/7 Ghost Support
- Hack-free Protection
- Fast SSD Storage
- Free Domain Transfer
- Free Ghost Transfer
- Immediate Activation
- Free Cloudflare CDN
