How to Manage an IP Address List for SSH Access
Updated on Oct 1, 2021
In order to improve security and provide our customers with more ways for managing access to their shared hosting accounts, we have introduced a new option that is available directly via the FastComet client area. This will allow you to enable SSH access for a specific device.
You will need to add your IP Address via the new tool if you wish to connect via SSH to your account. This is valid even if you want to use the SSH Access feature available in cPanel (which allows you to generate or import SSH keys) as the port will be unavailable unless your IP is already allowed via the SSH Access List.
To get started, all you have to do is log in to your FastComet account and click on the SSH Access icon now visible in the Quick Actions field for your hosting plan of choice.
![]()
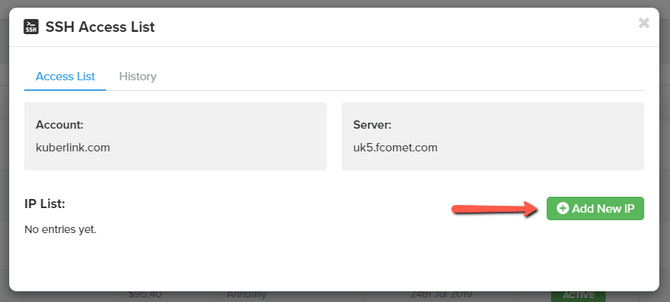
That will open the new SSH Acess List tool, via which you can grant access to a specific IP Address, remove access or view the history log of previous actions.
To add access for a new IP Address, click on the green Add New IP button.

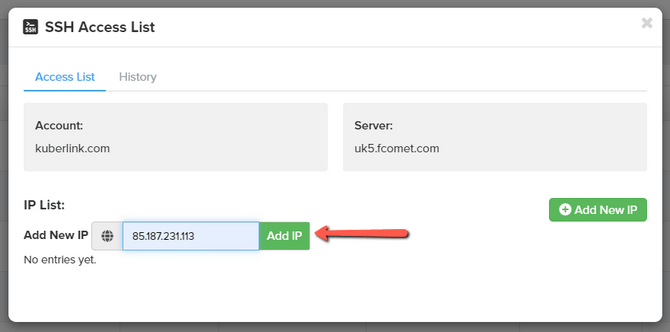
In the next step, simply write/copy the IP Address of choice and click Add IP.

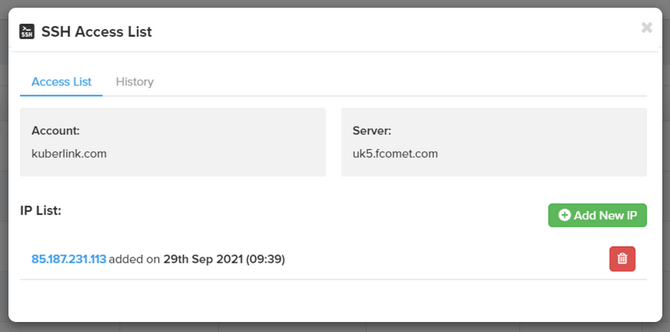
After this is done, you will see the newly added IP in the IP List and the exact date and time at which the same was added. Here you will also see a trash bin icon that can be used to remove IPs from the list.

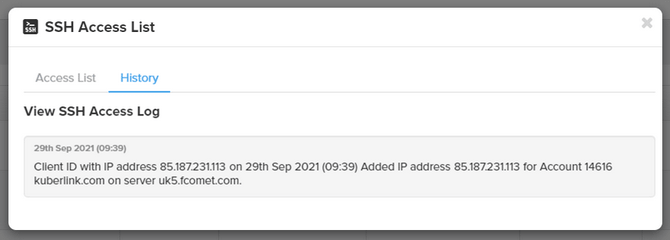
If you have more than one person accessing your hosting account (developer or business partner) and wish to check a log of what IP Addresses were added and by whom, you can do that in the History tab.

After reading through this tutorial, you should be able to fully manage the SSH access to your account based on the newly added functionalities in the SSH Access List tool.

SSD Web Hosting
- Free Domain Transfer
- 24/7 Technical Support
- Fast SSD Storage
- Hack-free Protection
- Free Script Installation
- Free Website Transfer
- Free Cloudflare CDN
- Immediate Activation
