How to Manage Menus in Drupal 8
Updated on Mar 13, 2019
To create a certain order in your website and have more sorting options, you will want to use the menu feature of Drupal 8.
To properly Manage Menus in Drupal, you will need to:
Create a Menu
To create a new menu, login to your admin account and navigate to the Manage → Structure section.

Click on the Menus section to access the Menu management page.

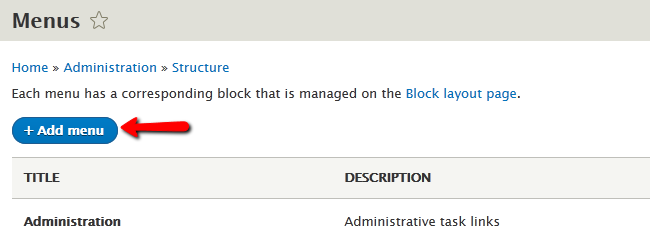
In here, you can see all of your current menus and create a new one by clicking on the +Add menu button.
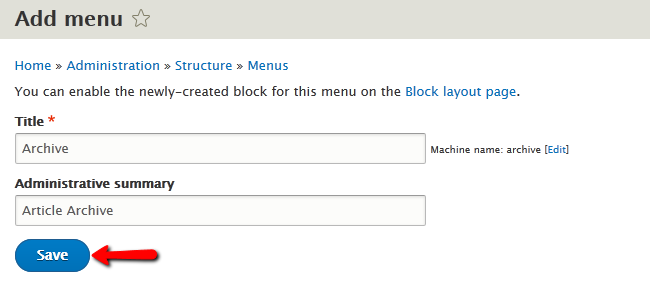
Now add a Title for the new menu and an optional Administrative summary(this will make it easy for you to find the menu in the back-end of your website).
Add Menu Links
A menu will be useless, if let without content, so let us add some links that will represent sections of the menu. To do that you will need to click on the Add link option.

Now you can configure:
- Menu link title - The text that will be displayed on the link
- Link - You can either copy the URL to the piece of content or start writing its title and then select it from the list of items you receive
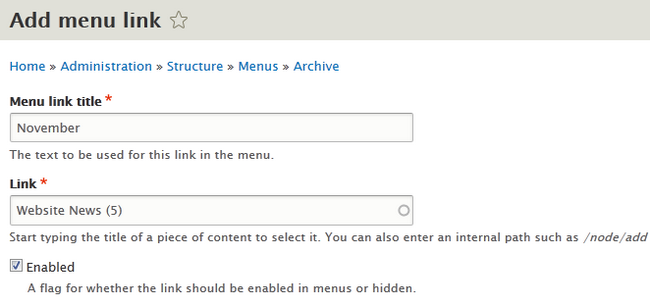
- Description - A short description that will be shown when a user hovers over the link
- Parent link - The "parent" menu of the link
- Weight - The priority of the link will determine its position when two or more links are in the same menu and structure depth. (lower weight means higher position with 0 being at the top)
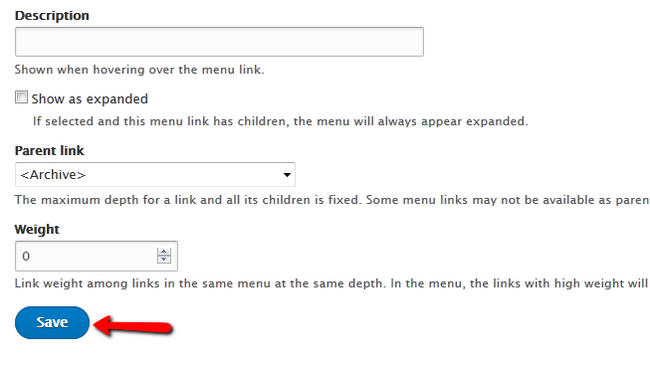
Click on the Save button when you are done. When you are moved back to the menu itself, please hit the Save button again, to update the entire menu entry.
Assign the Menu to a Block
Menus by themselves are invisible, unless assigned to a block on your website's layout. To assign the newly created menu we just configured to a block, go to the Manage → Structure section and select the Block layout option.
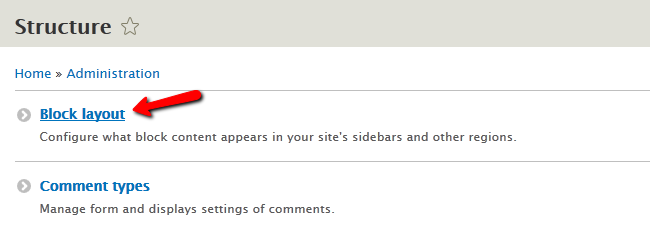
Here you will see all of your layout elements and you will need to decide where to put the menu you created. For the purpose of this tutorial we will add our menu to the Sidebar of our website by clicking on the Place block button for the corresponding element.

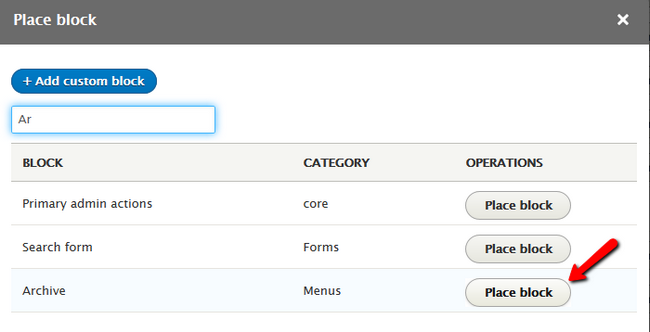
In the newly opened window, you will see a lot of blocks, so you can use the search function to narrow down the results and then select the menu of your choice by clicking the Place block button.
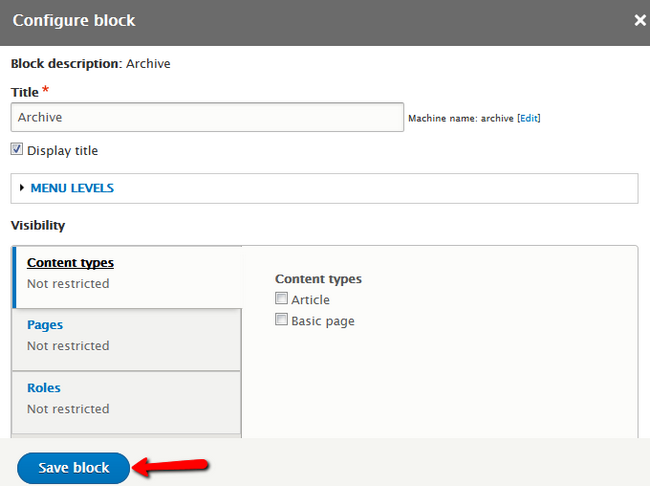
Here you can configure the block by selecting a Title for it and restricting the content types available for it if you so desire. When you are ready to finalize the procedure, click on the Save block button.
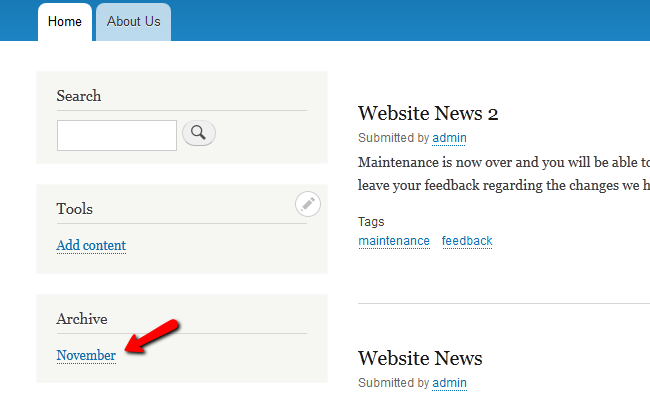
If you go to the front-end of your website, you will see the newly created menu, with its menu link being displayed in the Sidebar block.
Congratulations, you now know how to add and manage menus in Drupal 8.

Drupal 8 Hosting
- Free Drupal 8 Installation
- 24/7 Drupal 8 Support
- Free Domain Transfer
- Hack-free Protection
- Fast SSD Storage
- Free Drupal Transfer
- Free Cloudflare CDN
- Immediate Activation