How to install a theme in Drupal
Updated on Dec 10, 2015
It is important to generate a full backup of your Drupal website before any new installations or major changes on it. This way, if something goes wrong with your website, you will always have a working copy that can be restored. This is a good practice, which will allow you to edit and manage your Drupal installation without worrying that it may get corrupted.
Create a Backup
It is recommended to create Drupal backup, before making major changes on your website. This allows you to restore it to a fully operational state if something goes wrong.
This tutorial will review the process of installing a new theme on your Drupal website. The default one looks good, however, you may always find yourself in a position that you wish to change things up.
The Theme Installation in Drupal includes the following steps:
Find a Theme
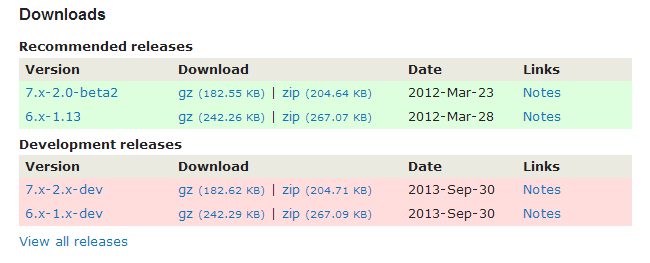
The best place to find Drupal themes is the official website of the script. There is a themes section on it, which you can use to find the best theme for your website. When you find one that you like, make sure that you download the theme for the Drupal version that you are running on your account. In our case, we have decided to download the Omega 4 theme for Drupal 7. The download link for Drupal 7.x is available at the bottom of the page.

Install a Theme
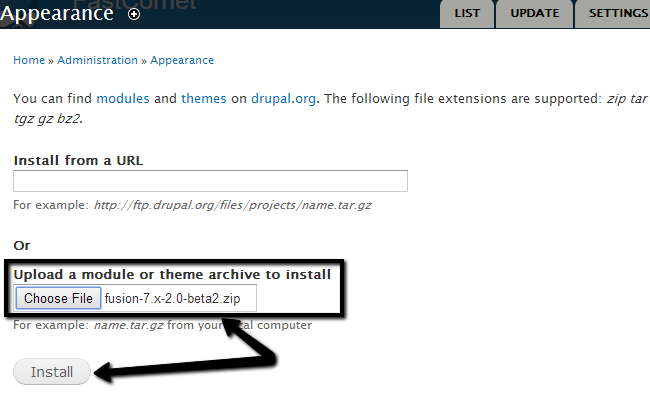
Once you download the theme on your local computer, you need to install it on your Drupal website. Log into your website as administrator and click on the Appearance tab from the main menu.

Click on the Install new theme button at the top of the page.

Upload the theme via one of the following two options:
- Install from a URL - You can simply enter the URL to the download page of the theme.
- Upload a module or theme archive to install - Upload the download archive of the theme.

Click on the Install button to complete the process.
Activate a Theme
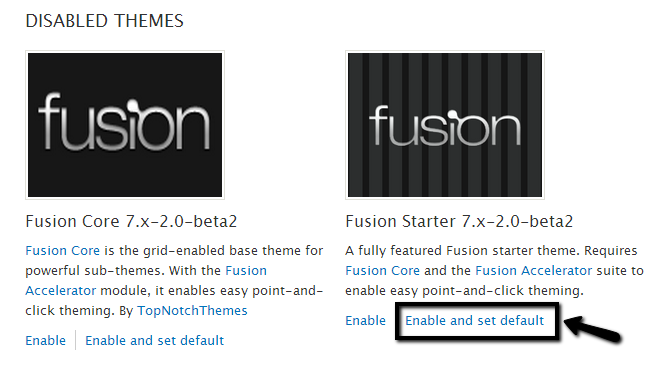
Access the Appearance tab from the main menu again and locate the Disabled Themes section. Click on the Enabled and set default button under your new theme.


Drupal Hosting
- Free Drupal Installation
- 24/7 Drupal Support
- Free Domain Transfer
- Hack-free Protection
- Fast SSD Storage
- Free Drupal Transfer
- Free CloudFlare CDN
- Immediate Activation
