Menu management in Drupal
Updated on Dec 10, 2015
This tutorial will review the Menu Manager in Drupal and what it offers. With Drupal, it is easy to manage and create menus on your website.
To fully manage menus in Drupal you will need to learn how to:
Access the Menu Manager
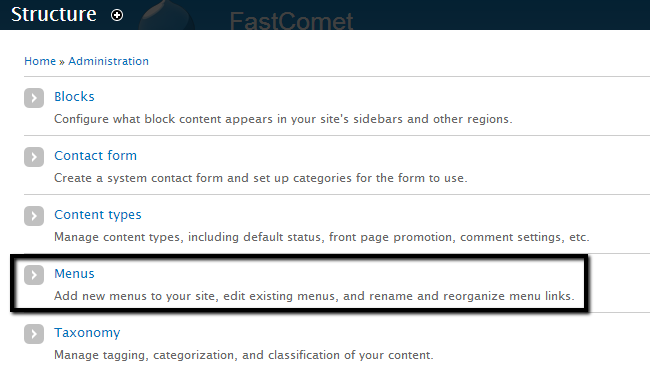
Log into your website as administrator and click on the Structure tab from the main menu.

Select the Menus option.
Create a Menu
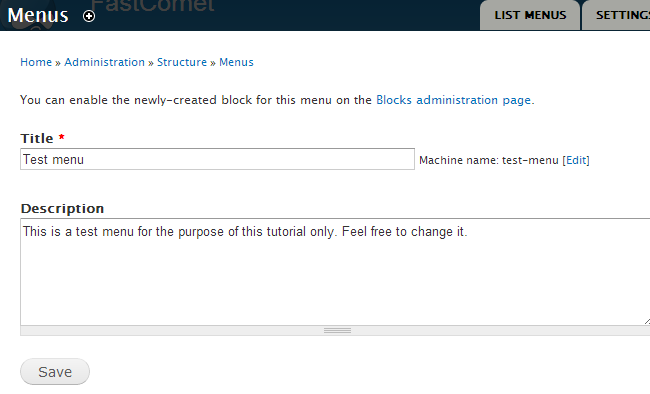
Access the Menu manager as administrator and click on the Add menu button at the top of the page.

Edit the following options:
- Title: Enter the title of the new menu item.
- Description: Enter a description for the new menu item.
Click on the Save button to create it.
Add link to a Menu
To add a link to a menu, you need to access the Menu manager as administrator. Then click on the Add Link button next to the menu, where you would like to assign it to.

Edit the following options:
- Menu link title - Enter the name of the new link item.
- Path - Direct link to the URL it will lead to.
- Description - You can enter a description for the link. This is optional.
- Parent Link - Enter the parent link for your menu link. This will be automatically chosen, depending on the previous step.
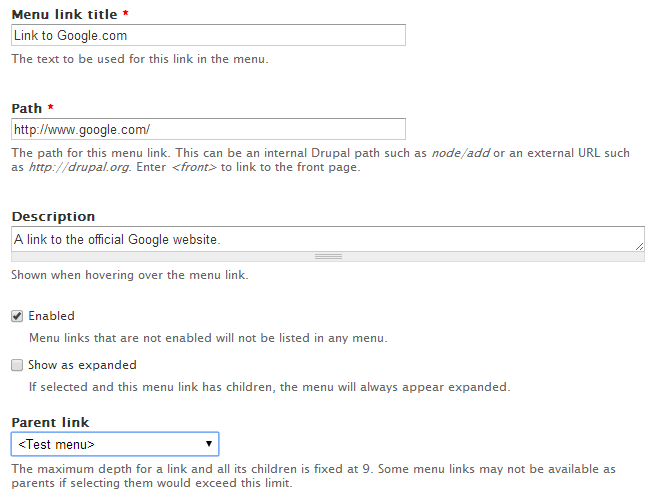
Click on the Save button to create the new menu link.
Assign a Menu to a Block
Even when you create a new menu, it will not be visible until you assign it to a block on your website. This will set the location of the menu on the front-end and display it for your users. Log into your website as administrator and navigate to the Structure tab from the main menu.

Select the Blocks option.
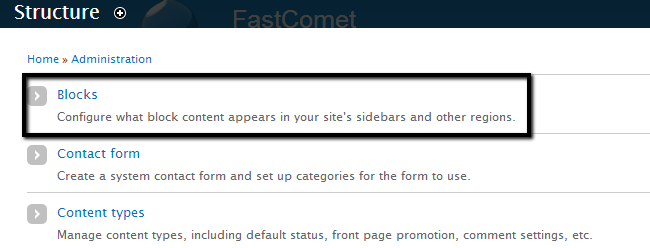
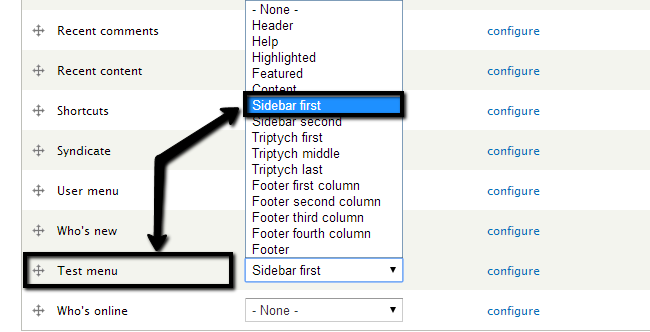
Locate the menu item that you wish to enable on your website. In our case, this is a pre-created menu called Test menu. Click on the drop-down button next to it and choose the position, where you wish to place it.
Remove Menus
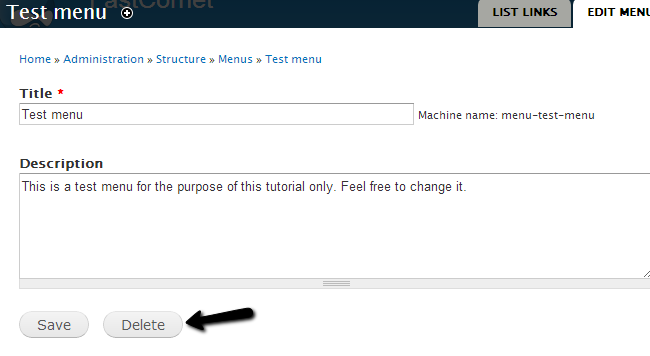
Note that you can only remove manually created menus from your website. The default ones that come with the initial Drupal installations cannot be removed. Access the Menu manager as administrator and click on the Edit Menu button next to the menu that you wish to remove.

Click on the Delete button below the description.
Congratulations, you now know how to create,edit and remove menus in your Drupal based website.

Drupal Hosting
- Free Drupal Installation
- 24/7 Drupal Support
- Free Domain Transfer
- Hack-free Protection
- Fast SSD Storage
- Free Drupal Transfer
- Free CloudFlare CDN
- Immediate Activation