Block management in Drupal
Updated on Dec 10, 2015
This tutorial will review the management of blocks on your Drupal website. You can add different types of content on your website, using blocks and assigned them on specific positions. This is one of the ways of placing content on your website and we will review the process further so you can get a better understanding on that.
The manage blocks in Drupal you need to know how to:
Access Block Manager
To access the Block manager, you need to log into your website as administrator and then click on the Structure tab from the main menu.

Click on the Blocks option.

Add Blocks
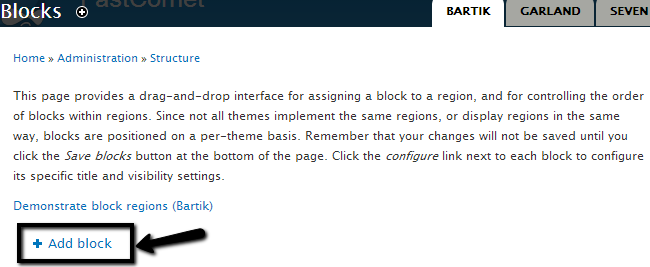
To add a new block, simply access the Block Manager and then click on the Add block button from the top of the page.

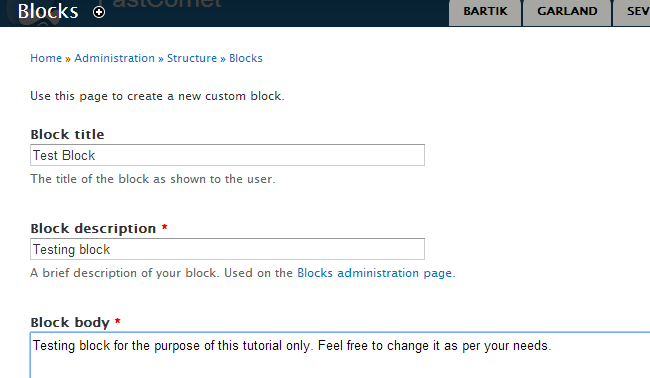
Edit the following options:
- Block Title - Enter the title of the new block.
- Block Description - Enter a description for the new block.
- Block Body - Enter the body for the new block.
- Region Settings - Choose the position of the new block on the default template.
- Visibility Settings - Show the block on all, specific or none pages.

To place a block on a specific position, you will have to first access the Block Manager and locate the block that you wish to move. Then, from the Region drop-down menu, simply choose the position on your template, where you wish to place the block.
Remove Blocks
Note that you cannot remove any of the core blocks that come with the default Drupal installation. However, any manually created blocks can be removed following those steps. First, you need to access the Block Manager and locate the block that you wish to remove.

Then click on the Delete button next to your block and the system will take care of the rest for you.

Drupal Hosting
- Free Drupal Installation
- 24/7 Drupal Support
- Free Domain Transfer
- Hack-free Protection
- Fast SSD Storage
- Free Drupal Transfer
- Free CloudFlare CDN
- Immediate Activation