Managing your Dolphin's Homepage Blocks
Updated on Dec 14, 2015
The elements displayed on the pages of your social community are called blocks. Each block is presenting different content to the user viewing certain page from your website and you are presented with the option to edit the order for these blocks on all of the pages of your social community.
In this tutorial we will show you how you should manage the blocks for the home page of your website. The management for the blocks located at the other pages is quite similar.
To manage the blocks in Dolphin, you will need to:
Step 1 Finding Modules
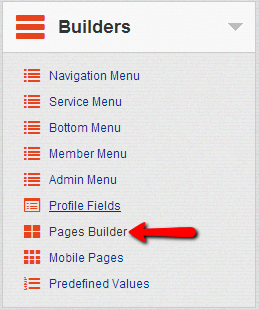
In order to access the block management section you will need to login into the administration area of your social platform and to navigate to Builders>Pages Builder.

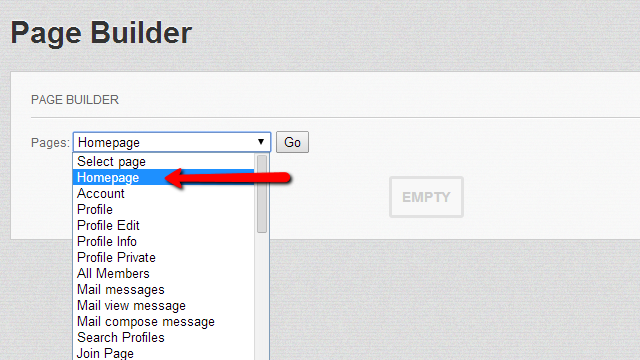
On the next page you will notice an section called Page Builder. There from the Pages dropdown you can select the concrete page you would like to edit. For the purpose of this tutorial you will need to select the Homepage menu item and to press the Go button.

The next page you will be redirected to is the actual page where all of the blocks currently available for adding to your home page and also those that are already added will be displayed.
Step 2 Page Builder Overview and Usage
There also few other options which we will discuss in the next lines of this tutorial.
- Add column – As you might have noticed your home page is separate on two columns of blocks. This button can add an additional column of blocks to that page
- Add Page – This button will add a completely new page to your website where you can build the content you would like to

The next section is called Page Width and as the name suggest using the slider you will be able to set the width of the page you are editing.

Note that the changes in the width are dynamically applied as all of the changes you are performing on this section.
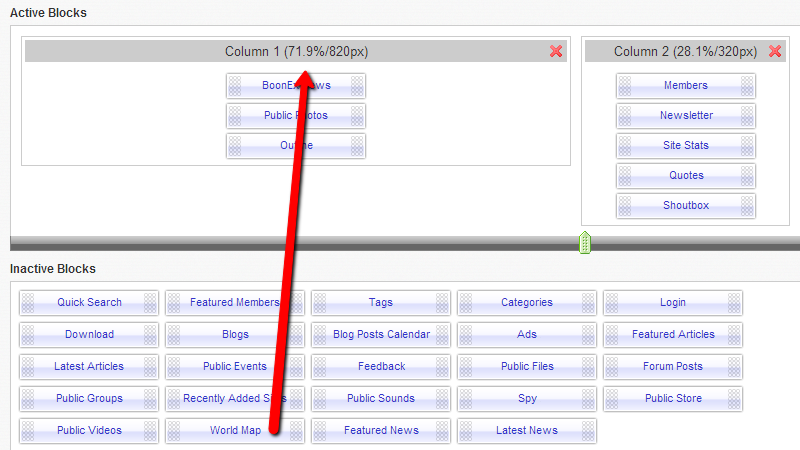
The next section is where you active blocks are stored. Those blocks are the actual visible elements on your pages.

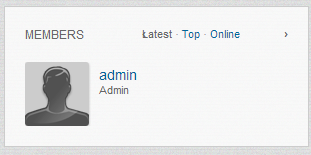
For example as you can see there is an active block called Members in the second column of your home page. The actual look of that block on your homepage is quite different than the small button like element you are seeing here.

The same basically goes for all other blocks.
Step 3 Add a Block
In order to add a new block to one of the columns for the page you are building you should check the next section called Inactive Blocks. There you can find all of the blocks you are allowed to add to your pages.

The adding process itself is as simple as dragging a block from the Inactive Blocks section to the Active Blocks section. Let’s add for example the World Map block to the left column of the home page above the Boonex News module.
Simply drag and drop the block above the Boonex News block so you can be able to display the world map on your website.
The process of removing a block is as simple as adding such – simple drag and drop the block you would like to remove from your Active Blocks to your Inactive Blocks.
Congratulations! You can now edit the blocks displayed on the homepage of your Dolphin social community!

Dolphin Hosting
- Free Dolphin Installation
- 24/7 Dolphin Support
- Hack-free Protection
- Fast SSD Storage
- Free Domain Transfer
- FFmpeg Support
- Free Cloudflare CDN
