How to check your Disk Usage
Updated on May 8, 2018
Disk usage can be easily checked regardless of the application which you use for building a website. This is due to the fact that the information is available in your Client Area and cPanel, despite many applications actually having plugins that can show you the disk space they use in specific. The Resource Monitoring System and cPanel visual representation of the Disk Usage is easy to understand. The latter is also provided at all times in the right corner of your cPanel which makes it really hard to miss.
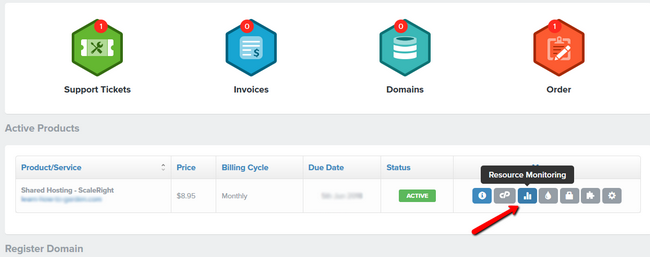
To check the General Disk Usage information about your hosting account, log in as a client in your Client Area with us and click on the Resource Monitoring button for the plan which you want to check.

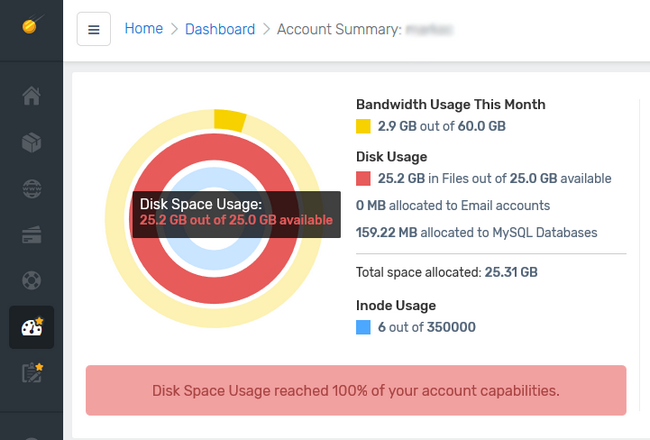
This will bring you to the Monitoring System which will show you more information regarding the resources used by your hosting account. In this example, we have reached the disk space usage quota for the account and even went a bit overboard, so we got a red warning message informing us of that.

You will also get an email notification to be always informed, in case the disk usage is generated without you actually uploading new files - by receiving emails or cache being generated by an application.
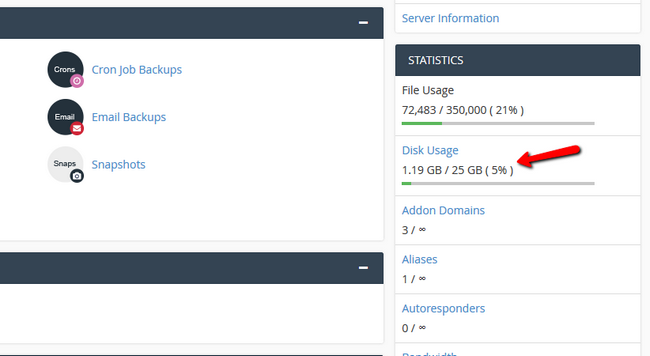
To do the same via your cPanel, please log in your cPanel and bring your attention to the right of the interface window. This time, we have chosen another account with lower disk usage.

The color of filling will change based on the amount of disk space left before you reach 100% of your hosting account's capabilities from green to yellow and red respectively. If you are in the green, you have nothing to worry about. Being in the Red, however, brings up concerns about your disk usage, and at that point, you should take measures as per our tutorial on how to reduce your disk usage.
To see your disk usage in detail, click on the link type Disk Usage text from within your cPanel (or access it by typing disk usage in the search field) and read more about it in our Detailed Disk Usage tutorial.

Optimized SSD Web Hosting
- Free Domain Transfer
- 24/7 Technical Support
- Fast SSD Storage
- Hack-free Protection
- Free Script Installation
- Free Website Transfer
- Free Cloudflare CDN
- Immediate Activation
