How to Create MX Records
Updated on Sep 7, 2018
MX records make our lives easier as they let us be flexible with our emails and mail structure. For more information on this DNS records and how to setup them via your client area, you can read our "How to Add and Edit MX Records" on the matter.
As a lot of users want to configure the email accounts hosted with us to work with Google Apps, we will show you just that, this time via cPanel. This way your domain's incoming email will appear in Gmail.
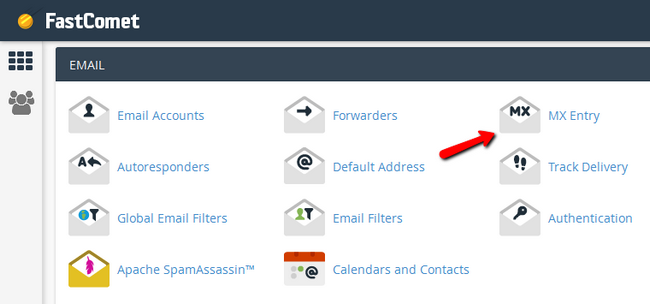
The first thing you will need to do is to log into your cPanel account and navigate to the Email → MX Entry option or simply type MX Entry in the search field.

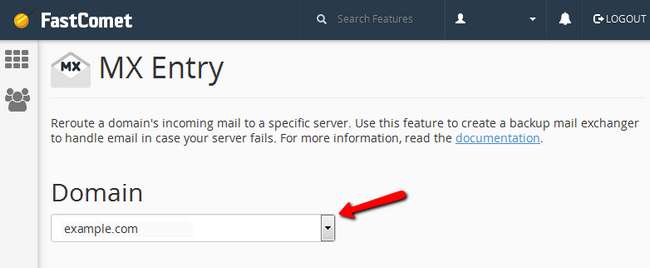
Now you must choose the domain for which you wish to change your MX records.

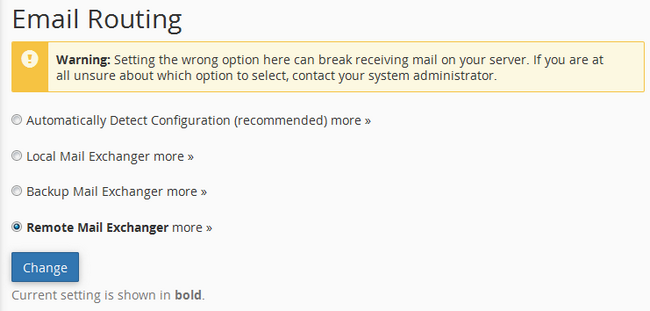
For the email routing option you can go with Automatically Detect Configuration, but we suggest to use Remote Mail Exchanger just to be 100% sure your emails will go where you specify.

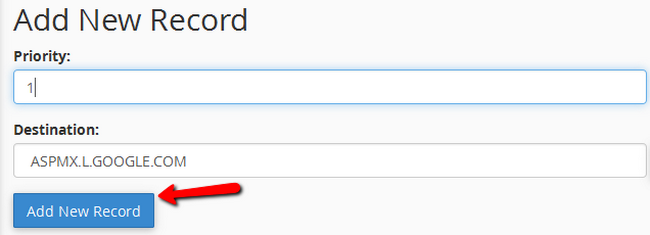
In the Add new Record fields, input the priority and destination. In our case we will use the top priority mail server - ASPMX.L.GOOGLE.COM

Don't forget to remove all unnecessary MX records once you are done using them. This will guarantee a smooth transition each time you decide to make a change. Aldo due note, that you will experience a small propagation period once you change your MX records. If you also add the alternative Google MX records and by some chance the main server is unavailable, your mail will be redirected to another Google mail server and still reach its destination. Here are the alternative MX records with their respective priority:
- ALT1. ASPMX.L.GOOGLE.COM - 5
- ALT2. ASPMX.L.GOOGLE.COM - 5
- ALT3. ASPMX.L.GOOGLE.COM - 10
- ALT4. ASPMX.L.GOOGLE.COM - 10
Specifically for this example, you will also have to use the Google Apps Setup Wizard in configuring the email you want to use, after you have changed your MX records.
Congratulations, you now know how to add MX records for your email accounts on a certain domain. You can also easily edit destinations and priorities by clicking on the edit button corresponding to the record you want to change.

cPanel Hosting
- Free Domain Transfer
- 24/7 Technical Support
- Fast SSD Storage
- Hack-free Protection
- Free Script Installation
- Free Website Transfer
- Free Cloudflare CDN
- Immediate Activation
