How to Manage Email Accounts in cPanel with Ease
Updated on Sep 7, 2018
cPanel provides an easy to use interface to manage all aspects of your email accounts. The provided options are ever-expanding with new standards and technologies added to email services, but in this tutorial, we will focus on cPanel version 82
To manage the Email Accounts associated with your hosting, you must learn:
How to Create an Email Account
For starters, please log in to cPanel and click on the Email Accounts icon under the Mail Section.
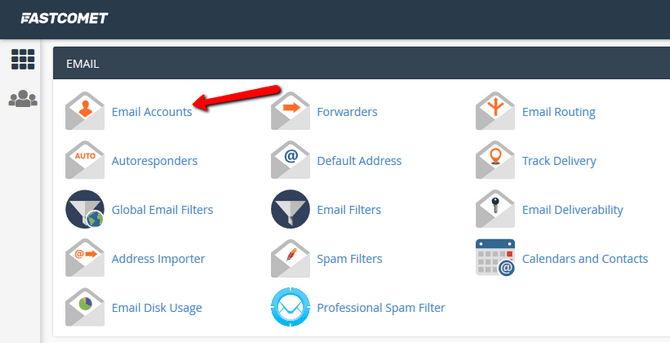
That will redirect you to the Email Accounts page via which you can create, delete, and manage your existing accounts. To create a new email address, click on the Create button at the bottom of the description settings.

Now you have to enter your email account name and password. There are 2 methods of creatng a password:
- Set password now - Add your own or let cPanel generated a strong password for you (recommended).
- Provide alternative email - Receive a password configuration link via email to complete the setup.
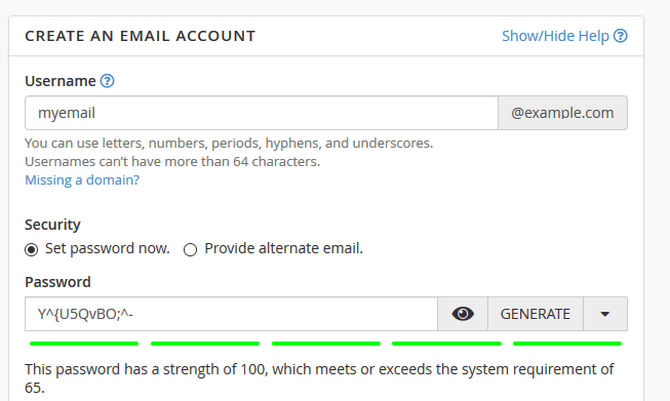
We highly recommend the use of a unique and robust password as that will protect you from random guesses and sequential access. The latter can happen when you use one password for multiple websites, and one of them gets compromised, which makes your other accounts vulnerable. This, along with not using dictionary words as whole passwords are all parts of the security best practices that help you protect your online identity.
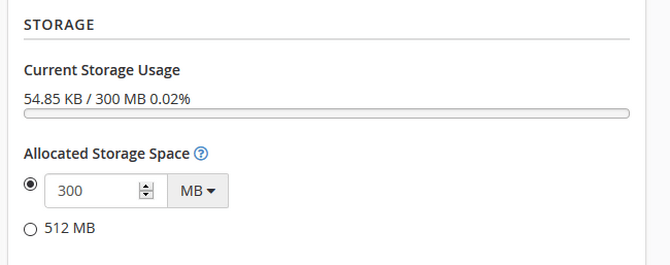
Next, you have to set up your email's quota. The Storage Space is the maximum size of your email account. If this quote is reached, all new emails will bounce back to the sender until enough space is available. You can configure the size manually or select the limit quota for your hosting plan if you are using a shared package.
Note:
The Storage Space field only works with whole numbers so you can go to a lower unit of size measurement for more precise tuning.
You may set up your contact information and subscribe to quota warnings by following our tutorial on How to update your cPanel contact information.
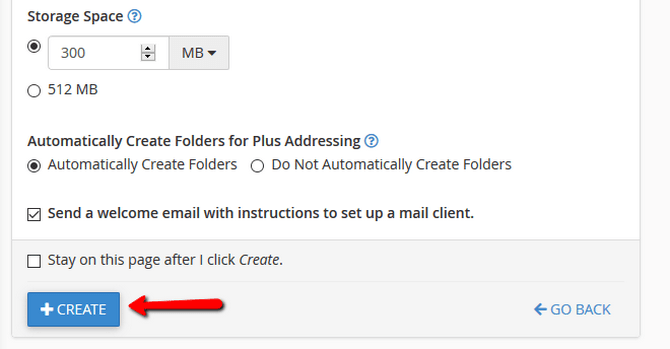
One of the newer features in cPanel's email account creation tool is the Automatically Create Folders for Plus Addressing option. This action will create a folder when this email address receives a message that uses plus addressing.
For example, the server will put a message sent to [email protected] in the email account [email protected] under a folder called "wpcamp19". Bear in mind, that plus addressing is excellent for filtering emails into folders and labels, especially if you receive event or customer-specific emails or forward such from another email of yours.
Click on the Create button to complete the setup once you are ready with all of the fields.
How to Manage Email Accounts
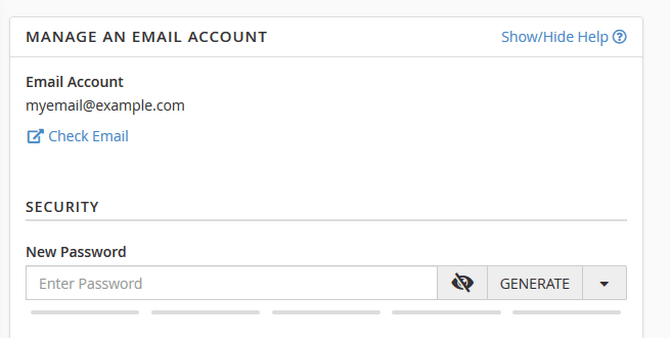
Once you have created an email account, you should be able to see it included in the email accounts list. In this section, you can enter and manage your email accounts as well as configure email clients manually or via automated scripts. As accessing your email account from within cPanel is self-explanatory and only requires you to choose which webmail client you want to use, we will go straight to the Manage section.

Change Password
As you can see, the first option here is almost the same as when creating an account. However, once created, you cannot change the name of the account, but you can switch the password.
Edit Email Storage Quota
You will also be able to edit the email storage limit via the allocated storage space selector. Do note that selecting a value lower than the current utilization of your email, it will automatically be colored red. Any future emails sent to you during the time this account is above the storage limit will not be received, so always check your current usage before making changes.
Warning:
cPanel calculates mailbox quotas every four hours, which means that you might not get instant notification once your account has exceeded its quota.
Manage Restrictions and Plus Addressing
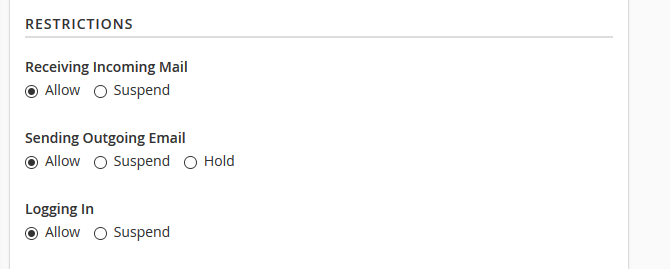
The Restrictions section is a set of new radio buttons you will see, which is only available in the management menu. With these three options, you can suspend receiving incoming and outgoing mail as well as logging in to this email account.
Note:
Suspending an email account will also suspend any aliases and forwarders that redirect email to that account.
Some of the other options include Hold, which is available for Sending Outgoing Email. This change will keep all outgoing emails in a queue, which will be delivered once the Allow state is re-applied.
Of course, you can change the plus addressing option if you wish to enable or disable it depending on your needs.
Don't forget to hit the Update email settings button when you are done changing the limits of your email account.
How to Delete Email Accounts
The extra option in the Manage menu is the account eraser one. Clicking on the Delete email account button will remove all of that account's data from the server.

That is why you should make sure you have all of your essential emails locally saved or moved to another email account before proceeding with this step. Once done, this is not revertable and the only way to access the removed emails is via a backup resotration.
How to Configure Email Account Extras
As you can see, some additional options regarding email accounts are available on the right part of the screen. We have already created separate tutorials for each of these features which you can find here:
- Free up Email Storage
- Manage Email Filters
- Send Automated Responses
- Connect Devices (this directory offers a list of configurable mail clients and devices including Apple and Adroid products)
As new features are added to this menu, we will do our best to update this tutorial with the latest and greatest tips for cPanel Email Account management.
You now know how to manage your emails, and with our extra tutorials, you can further expand the usefulness of your email accounts.

cPanel Hosting
- Free Domain Transfer
- 24/7 Technical Support
- Fast SSD Storage
- Hack-free Protection
- Free Script Installation
- Free Website Transfer
- Free Cloudflare CDN
- Immediate Activation
