How to manage your Members in ClipBucket
Updated on Mar 13, 2019
Clip Bucket integrates incredible social functionality for all of the registered users on your website. As every social website yours will also have large amount of members which you will need to manage somehow. With the integrated Members Management page Clip Bucket provides you with convenient and easy way to manage all of the registered members on your website and in the next lines of this tutorial we will present you with the functionalities included on this page.
This tutorial assumes that you have already logged into the admin area of your website.
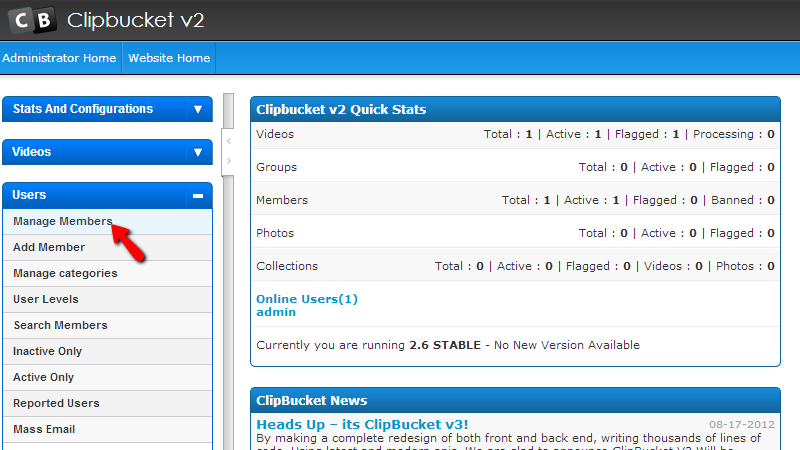
In order to access the Member Management page you will need to navigate to Users > Manage Members.

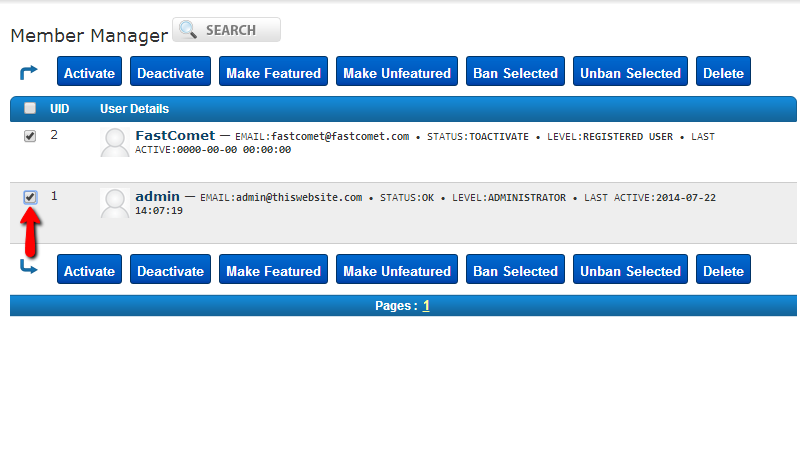
There you will be able to find conveniently structured list of the currently registered members on your website. At the top and the bottom of the table view with the members you will find several action buttons which will allow you to take different actions with the selected users.
- Activate – For activating the selected user
- Deactivate – For Deactivating the selected users
- Make Featured – For making a user featured
- Make Unfeatured – For making a user unfeatured
- Ban Selected – For banning the selected users
- Unban Selected – For removing ban on the selected users
- Delete – For deleting the selected users
No matter which option you will be using you will need to have a single user at least selected from the list of users. In order to select a user you will need to check the checkbox before the “UID” column.

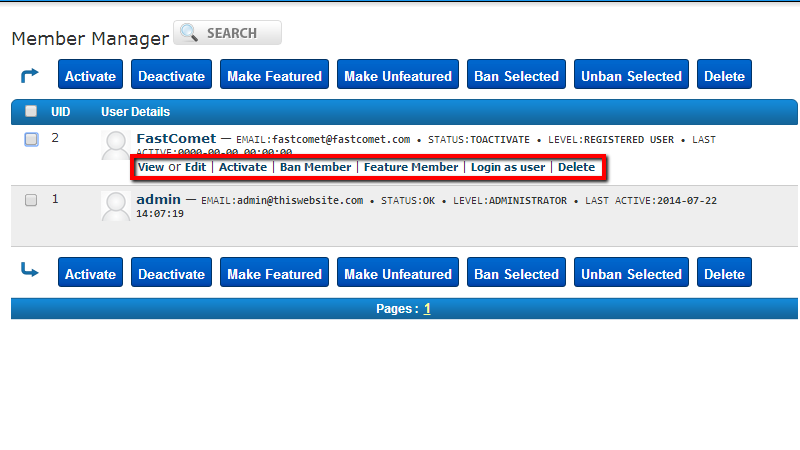
Additionally if you hover over each of the users listed in the table view you will be presented with few other options along with the already know options:
- View or Edit – With this option you can view the profile of a member and respectively edit it.
- Activate – With this option you can activate the profile of a member
- Ban Member – With this option you will be able to ban members
- Feature Member – With this option you will be able to make a member featured
- Login as User – This option will allow you to login as the member you are using this option for
- Delete – This option will allow you to delete a member

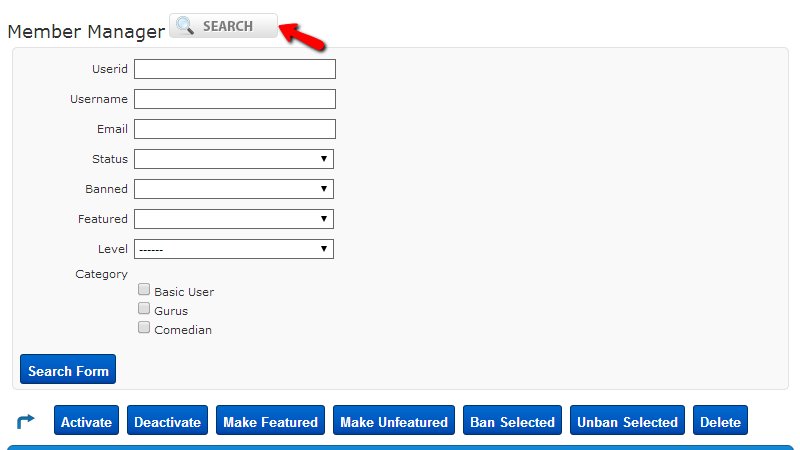
Finally the Member Manager page also provides you with an easy to use search tool so you can be able to better filter the members you would like to take actions against. The tool is located at the top of the page and if you click it you will be presented with several fields you can use for filtering the members.

Once you press the Search Form button you will be presented with the list of the found user based on the search criteria you have configured so you can be able to take actions against these users.
Congratulations! You can now fully manage the members of your website!

ClipBucket Hosting
- Free Installation
- 24/7 ClipBucket Support
- Free Domain Transfer
- Hack-free Protection
- Fast SSD Storage
- Free ClipBucket Transfer
- Free Cloudflare CDN
- FFmpeg Support
