How to Configure Taxes in AbanteCart
Updated on Mar 13, 2019
Tax Classes or also referred as Taxes are simple rules which are applied to concrete products or to all of them if the customer is from the defined in the Tax Class location. In the next few lines of this tutorial we will provide more information on how to configure your Tax Classes before those are applied to products.
To configure the Tax Rates in AbanteCart, you need to:
Step 1 Access the Tax Classes page
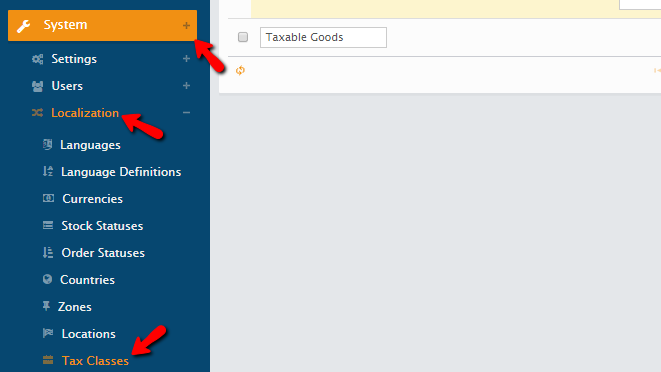
All of the globally used tax classed for your AbanteCart based website are stored in a dedicated page which you can access by logging into the admin area of AbanteCart and then navigating to System>Localization>Tax Classes.

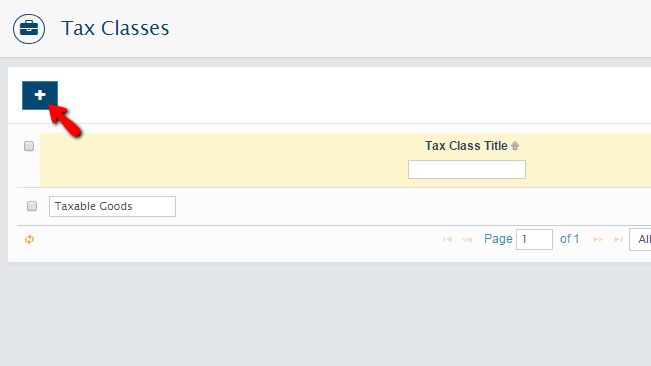
There you will be presented with a list of all the currently configure Tax Classes so you can be able to manage those easily.
Step 2 Add a New Tax Class
In order to add a Tax Class you will need to simply click on the “+” labeled button at the top left corner of the Tax Classes page.

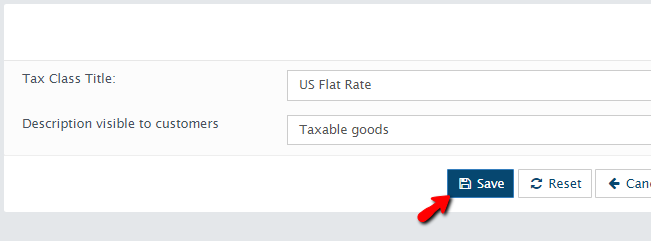
Then you will be redirected to a new page where you will need to configure the Tax Class title and the Description visible to customers using both of the provided fields.

When you are ready, you should click on the Save button so you can be able to save these configurations and move forward with the setup of the tax.
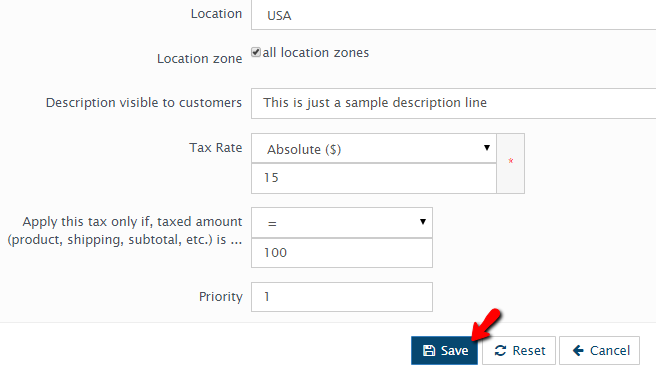
The next Screen will provide you with some additional options to configure for the just added tax.
- Location – The location this Tax will apply for
- Location zone – Here you can define concrete zone this tax should apply for
- Description visible to customers – The description of this tax visible to the customer
- Tax Rate – Here you can define if the tax should be percentage of the price or absolute value
- Apply this tax only if, taxed amount (product, shipping, subtotal, etc.) is ... – Here you can define when should this tax be applied in relation to the product’s overall pricing
- Priority – The priority of the tax

Whenever you are ready, please click on the Save button and the tax will be added to the Tax Classes.
Congratulations! You now know how to properly configure new Taxes in AbanteCart!

AbanteCart Hosting
- Free Installation
- 24/7 AbanteCart Support
- Free Domain Transfer
- Hack-free Protection
- Fast SSD Storage
- Free Cloudflare CDN
- Free AbanteCart Transfer
- Immediate Activation
